8 Easy Steps in Implementing Two-Factor Authentication on Synology Diskstation
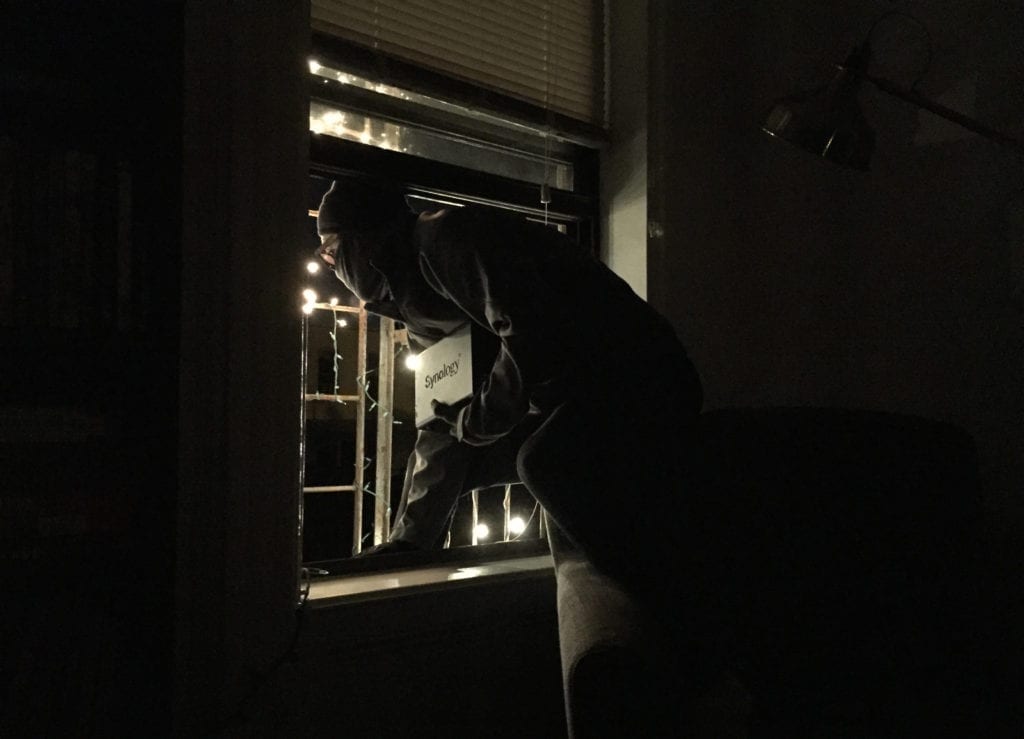 In an effort to reduce my monthly expenditure and further protect my personal data, I recently canceled my subscriptions with Dropbox and Google Drive. Working in IT has opened up my perspective to new types of hardware and technology with regards to privacy and security. Check out Synology. These guys make some cool hardware. I purchased a Synology DS214 Play for the primary reason to create a private in-house cloud storage system.
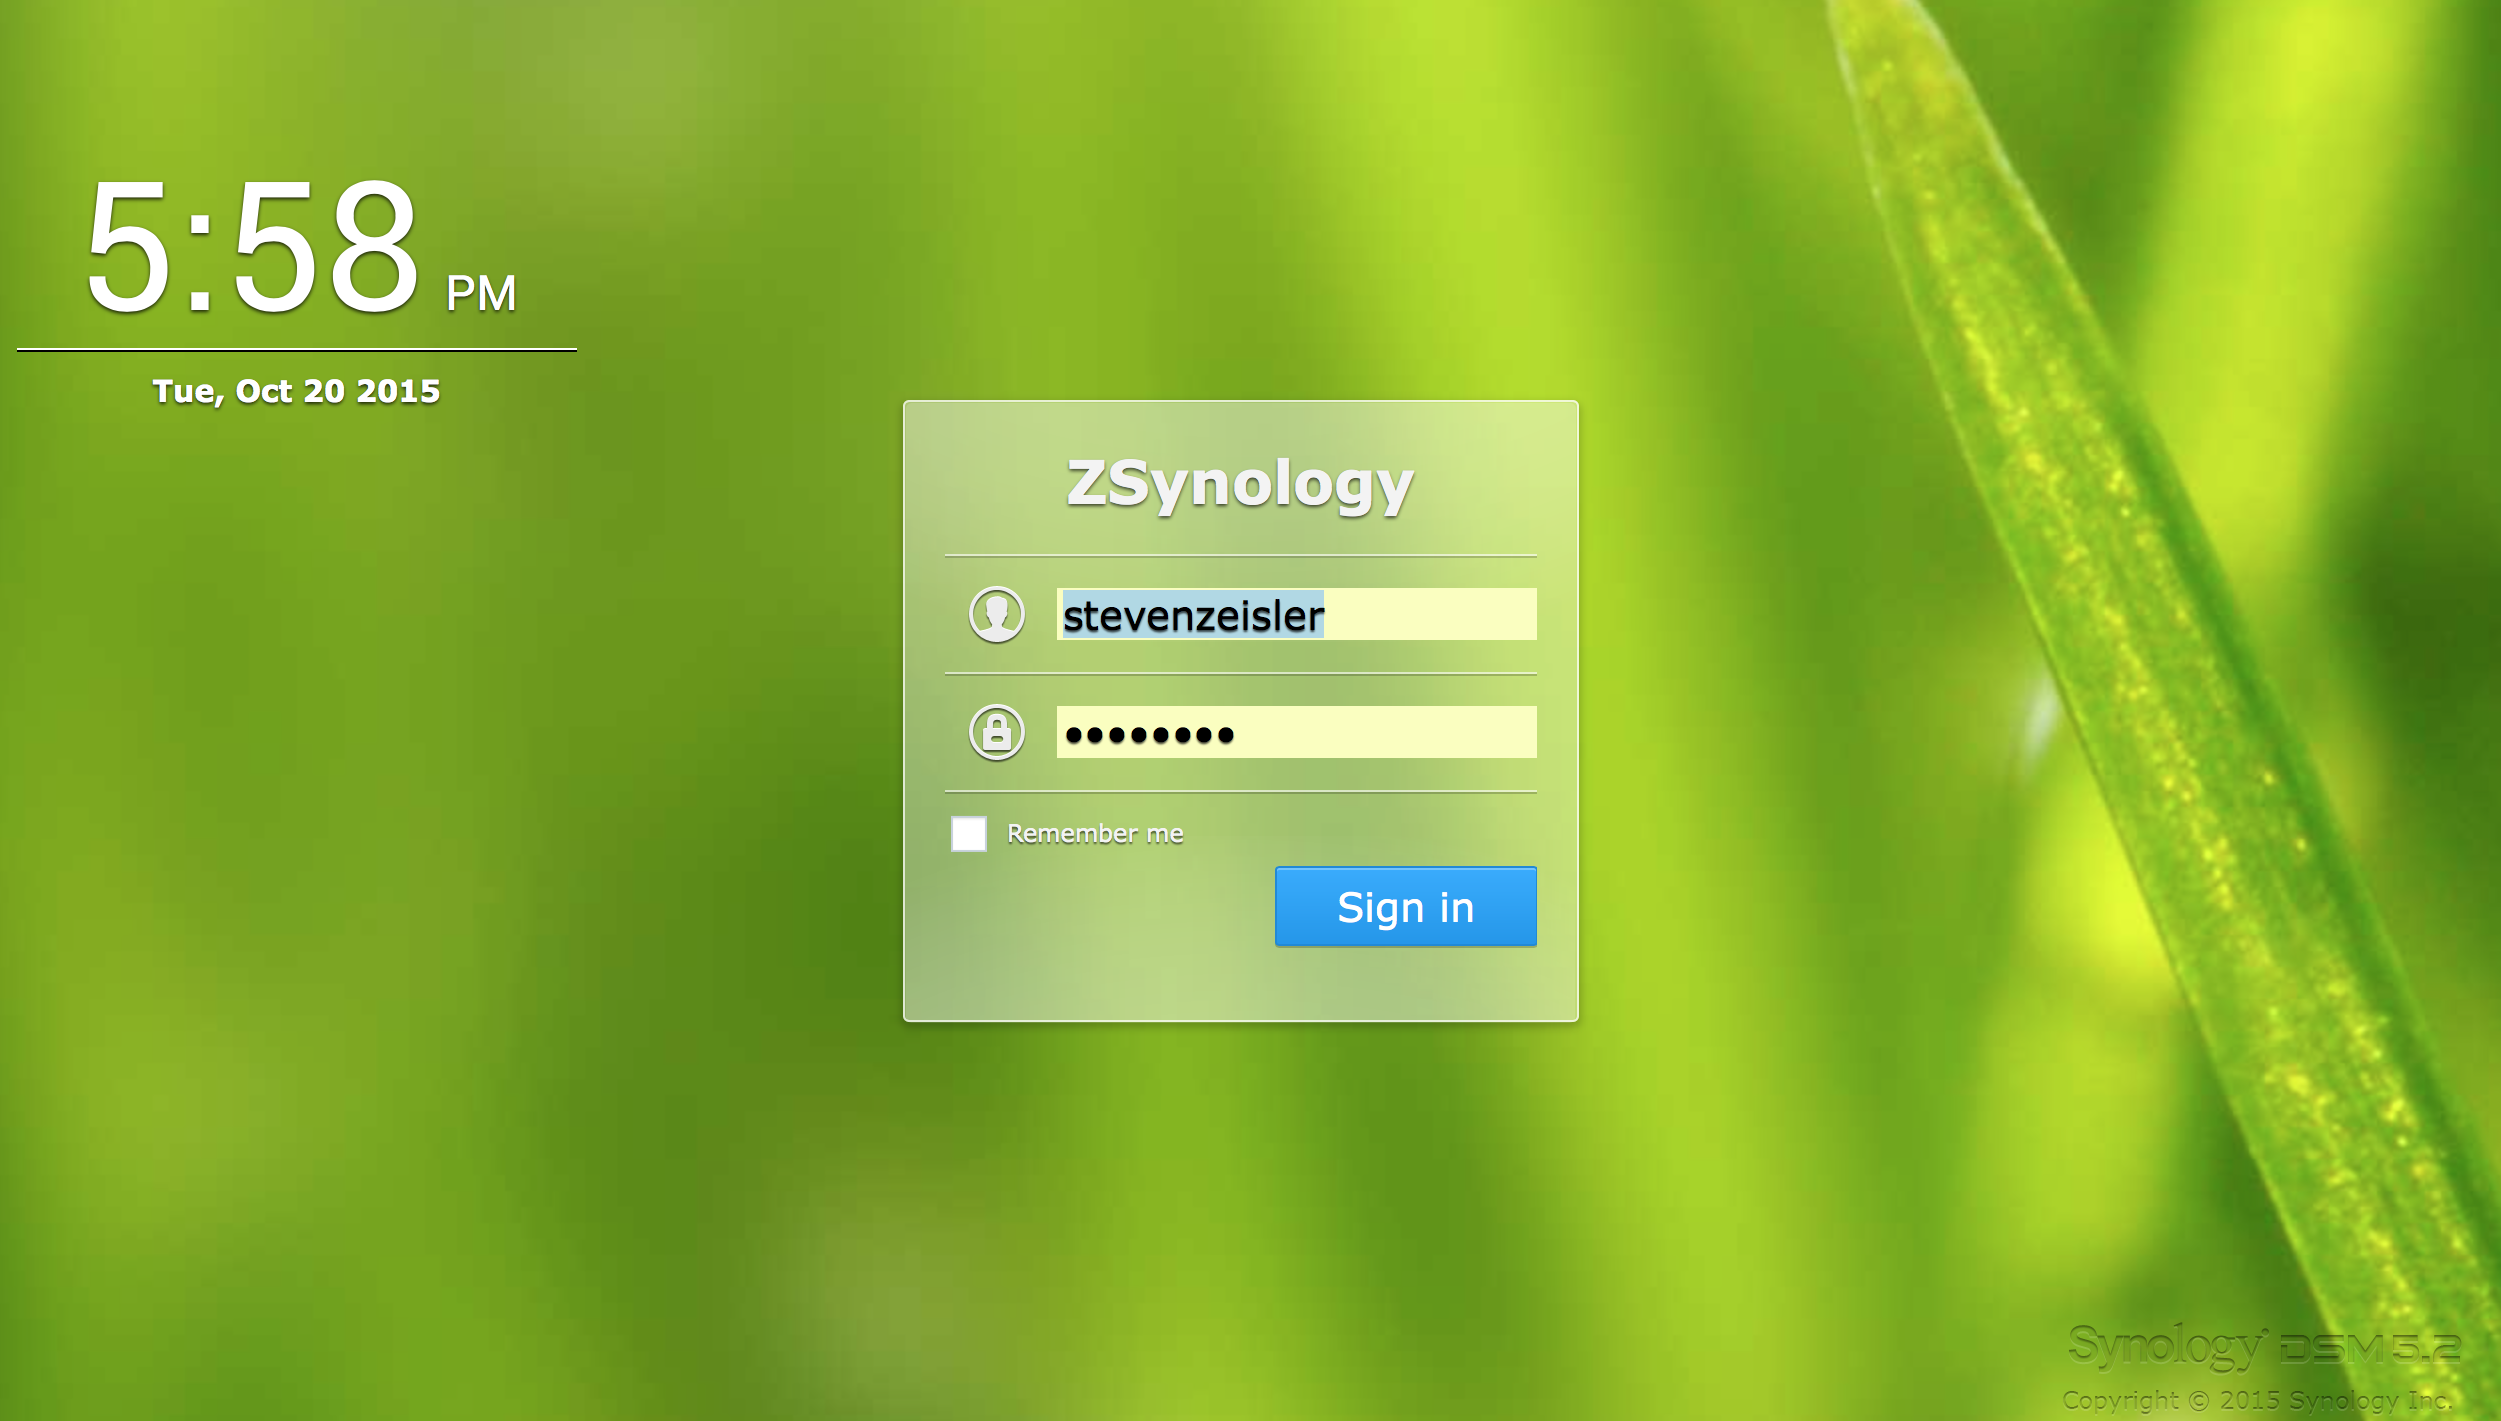
The base setup of the Synology was quick and painless. I was operational within 15 minutes of unboxing the hardware. Once you create your administrator username, the Synology OS prompts you to set up two-factor authentication. I use two-step (or two-factor) authentication because I want an extra layer of security in place to keep my personal data safe and away from an unauthorized user.
Unfortunately in today’s technological era, we are constantly reading about people getting hacked. Two-step authentication makes it harder for someone to access your data because it’s based on the premise that “an authorized actor is unlikely to be able to supply both factors required for access.” For example, that unauthorized actor would have to have access to both your laptop and cell phone. Here are some examples of other two-step authentication:
- Some physical object in the possession of the user, such as a USB stick with a secret token, a bank card, a key
- Some secret known to the user, such as an additional username, password, PIN
- Some physical characteristic of the user (biometrics), such as a fingerprint, iris, voice recognition
In the case of the Synology OS, the two-step authentication uses your laptop and your smartphone. If you skip the process of setting up two-step authentication at the beginning, that’s ok. You can always set it up later. The purpose of this blog post is to provide the step-by-step instructions to set it up from scratch.
Here is how to set up two-step authentication in 8 quick steps:
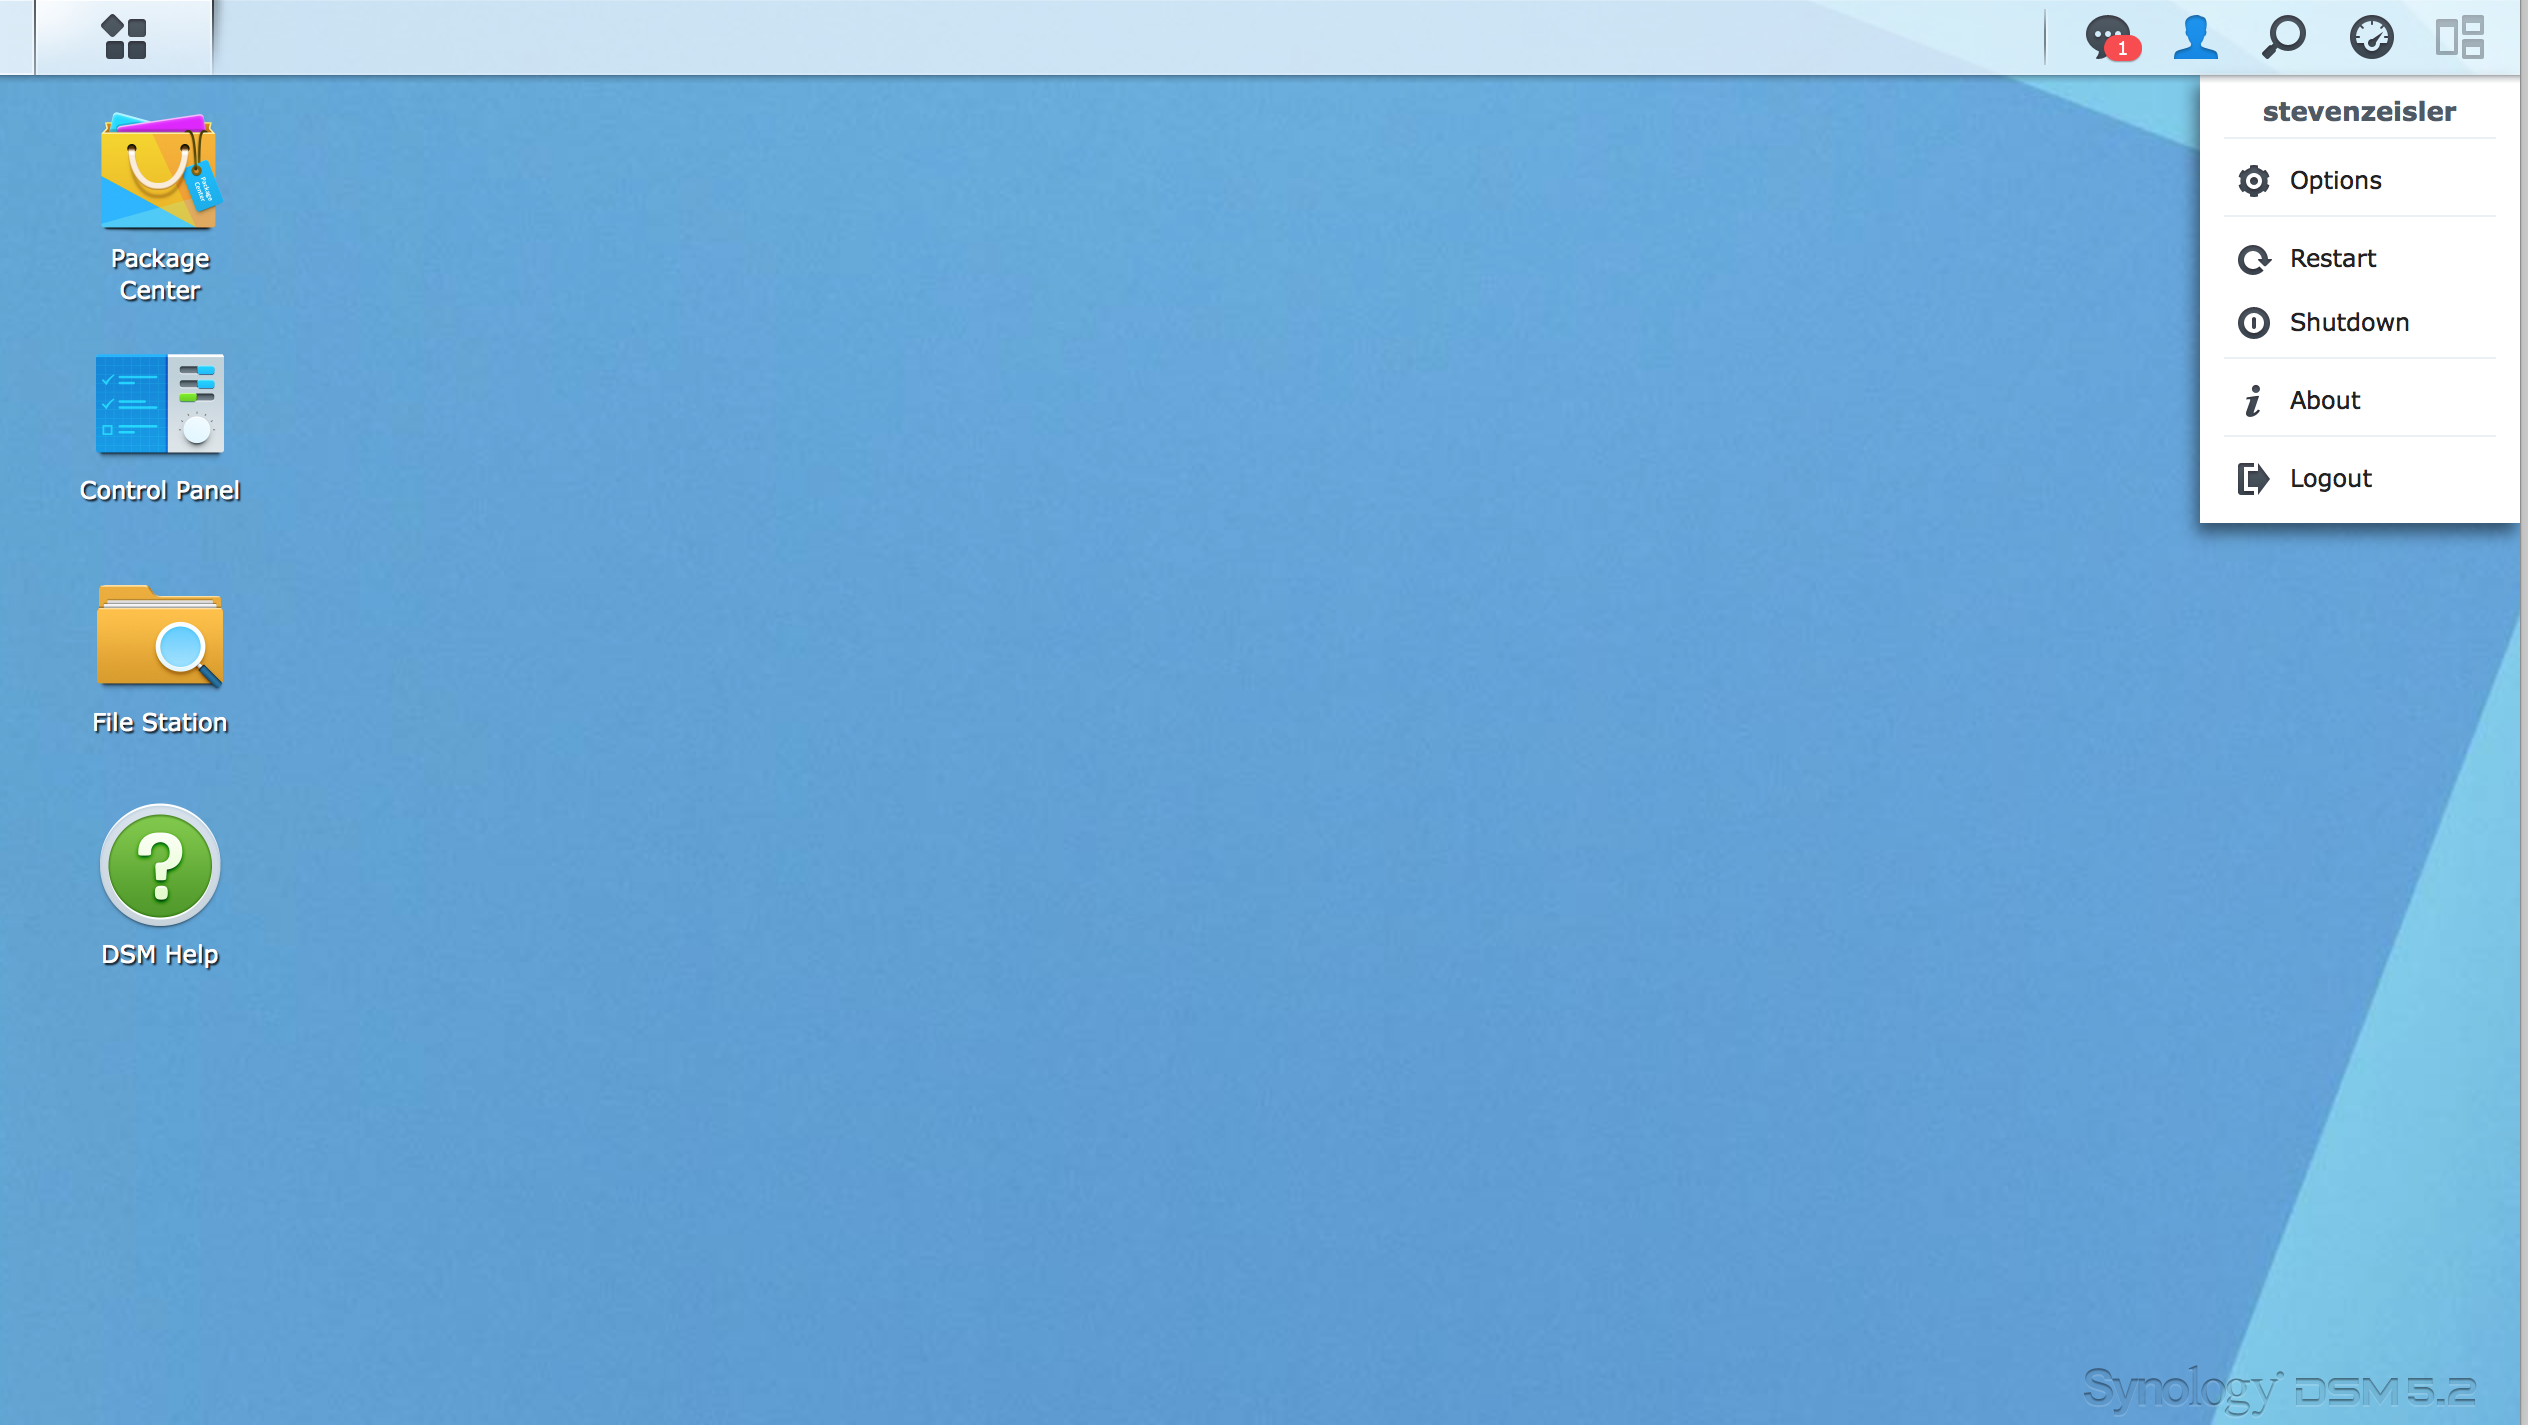
1. Click on your username drop menu and select Options.
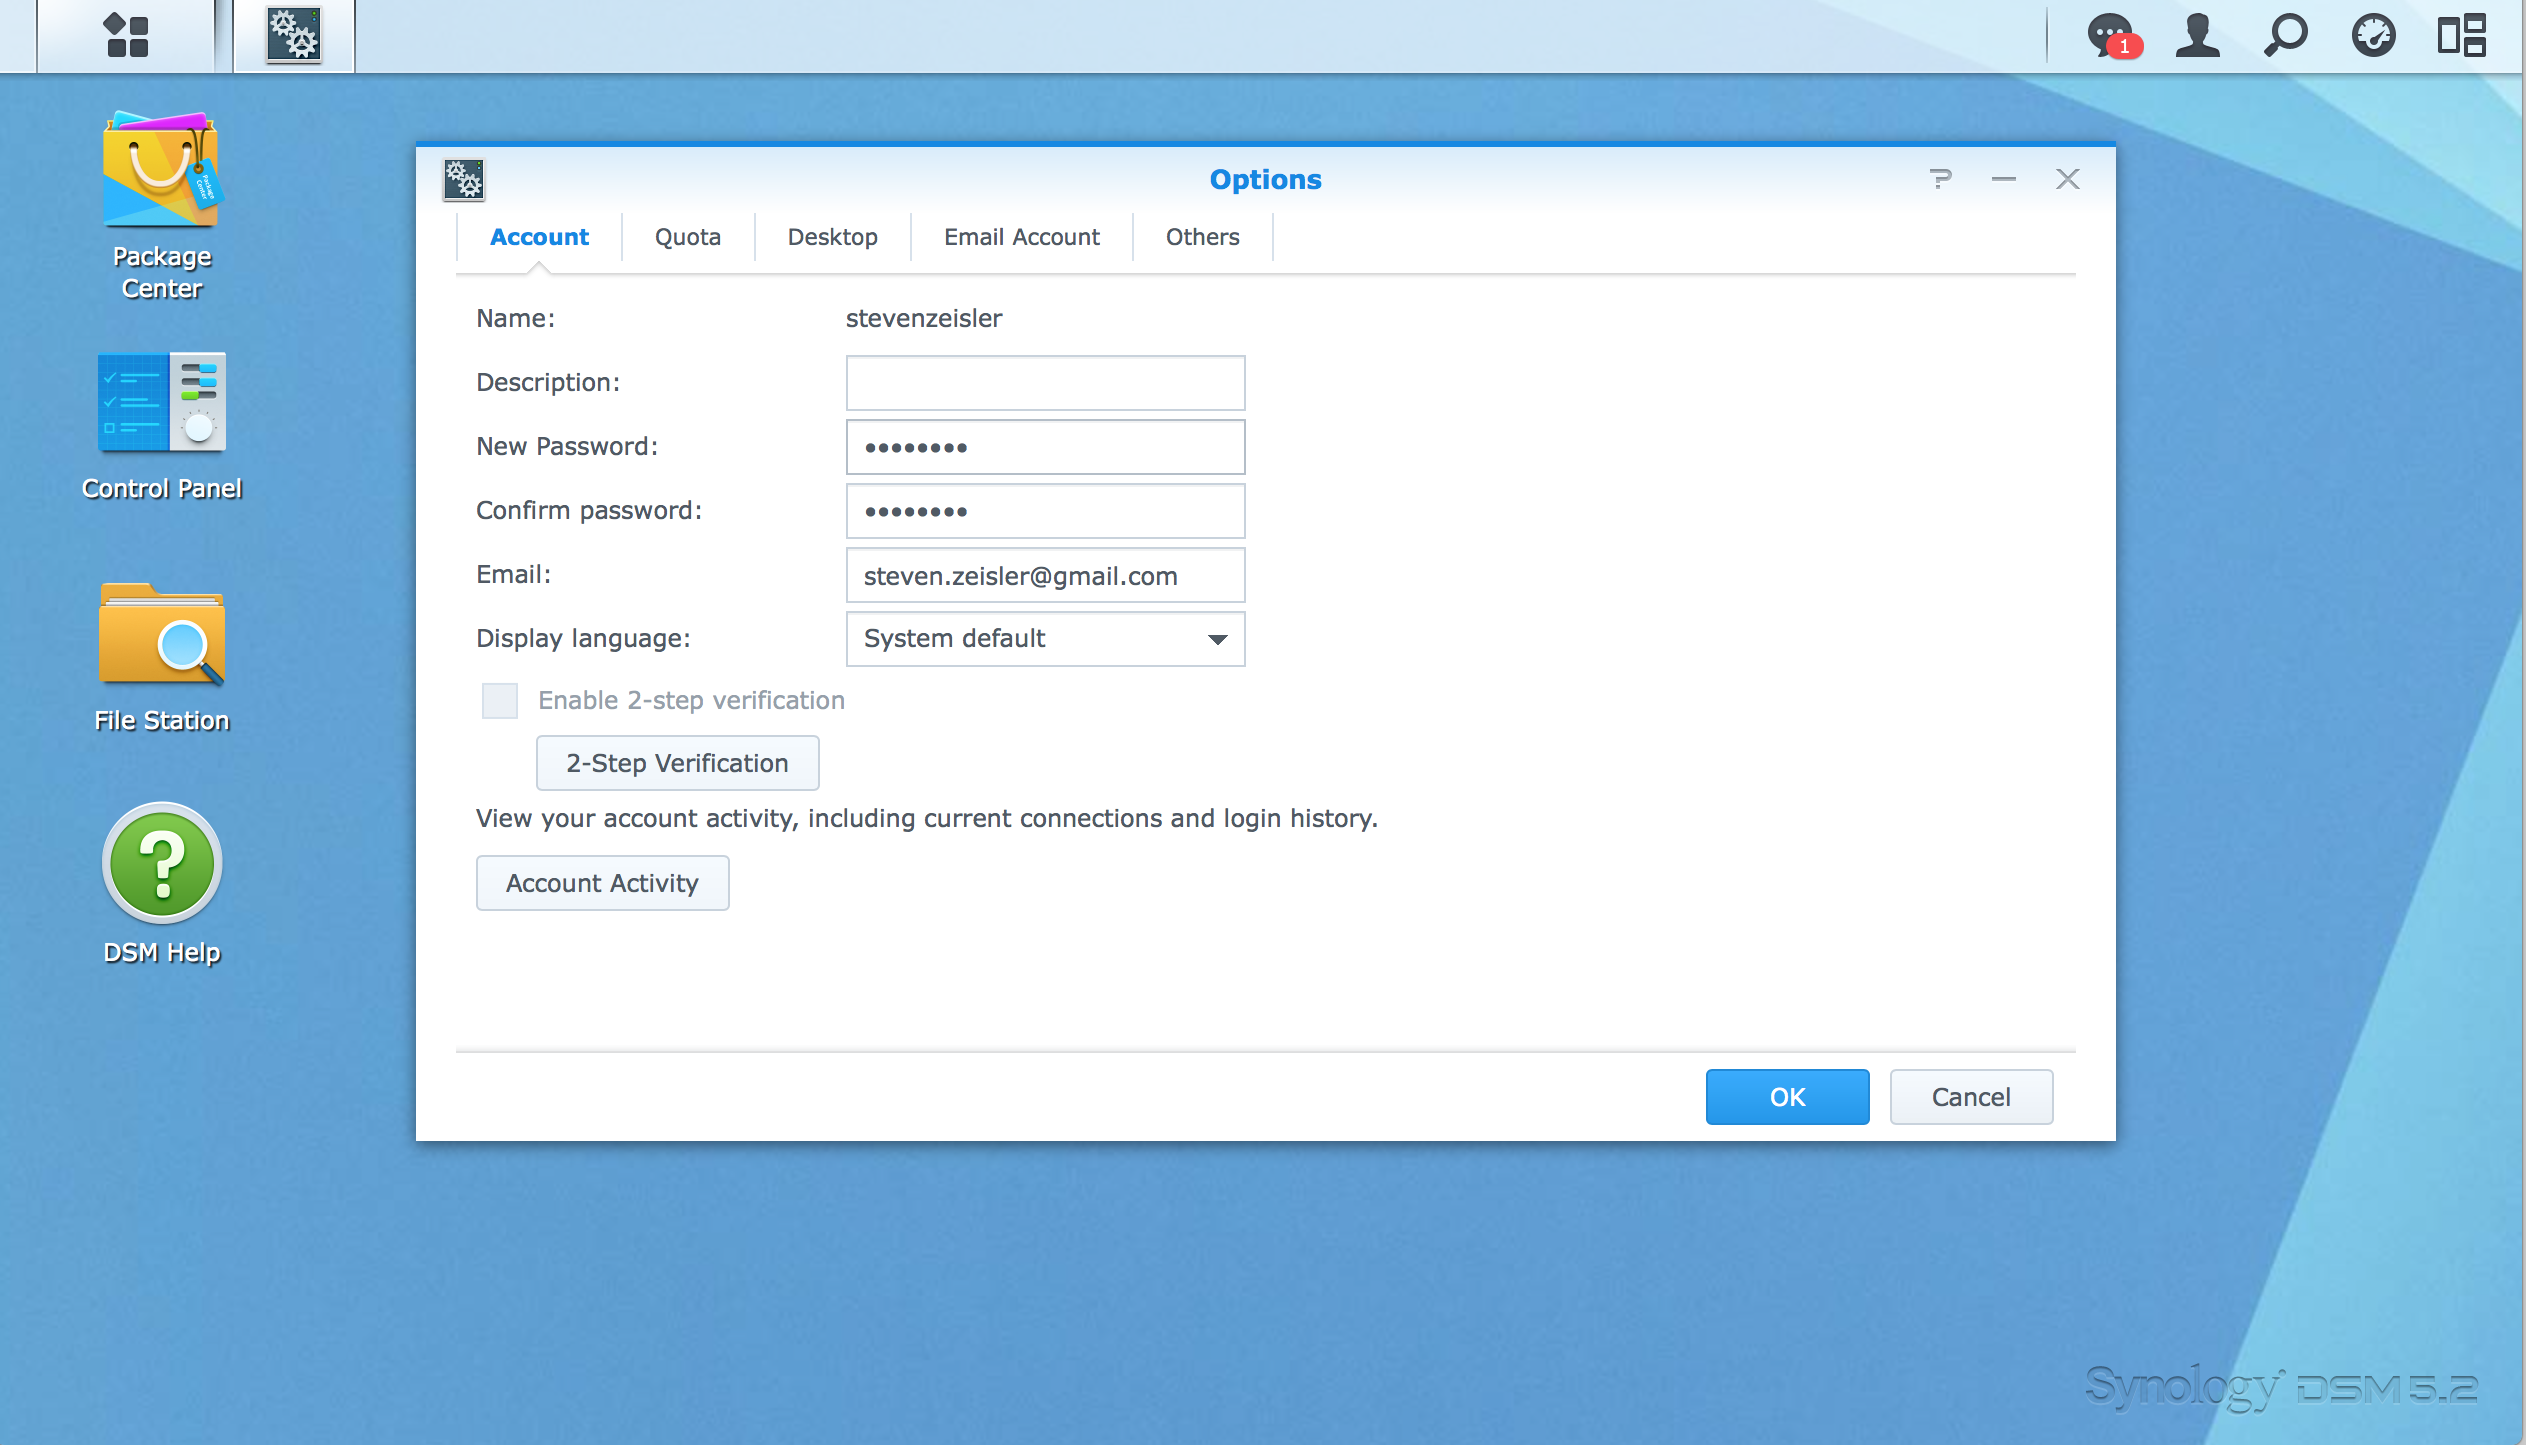
2. Select Account and click on 2-Step Verification.
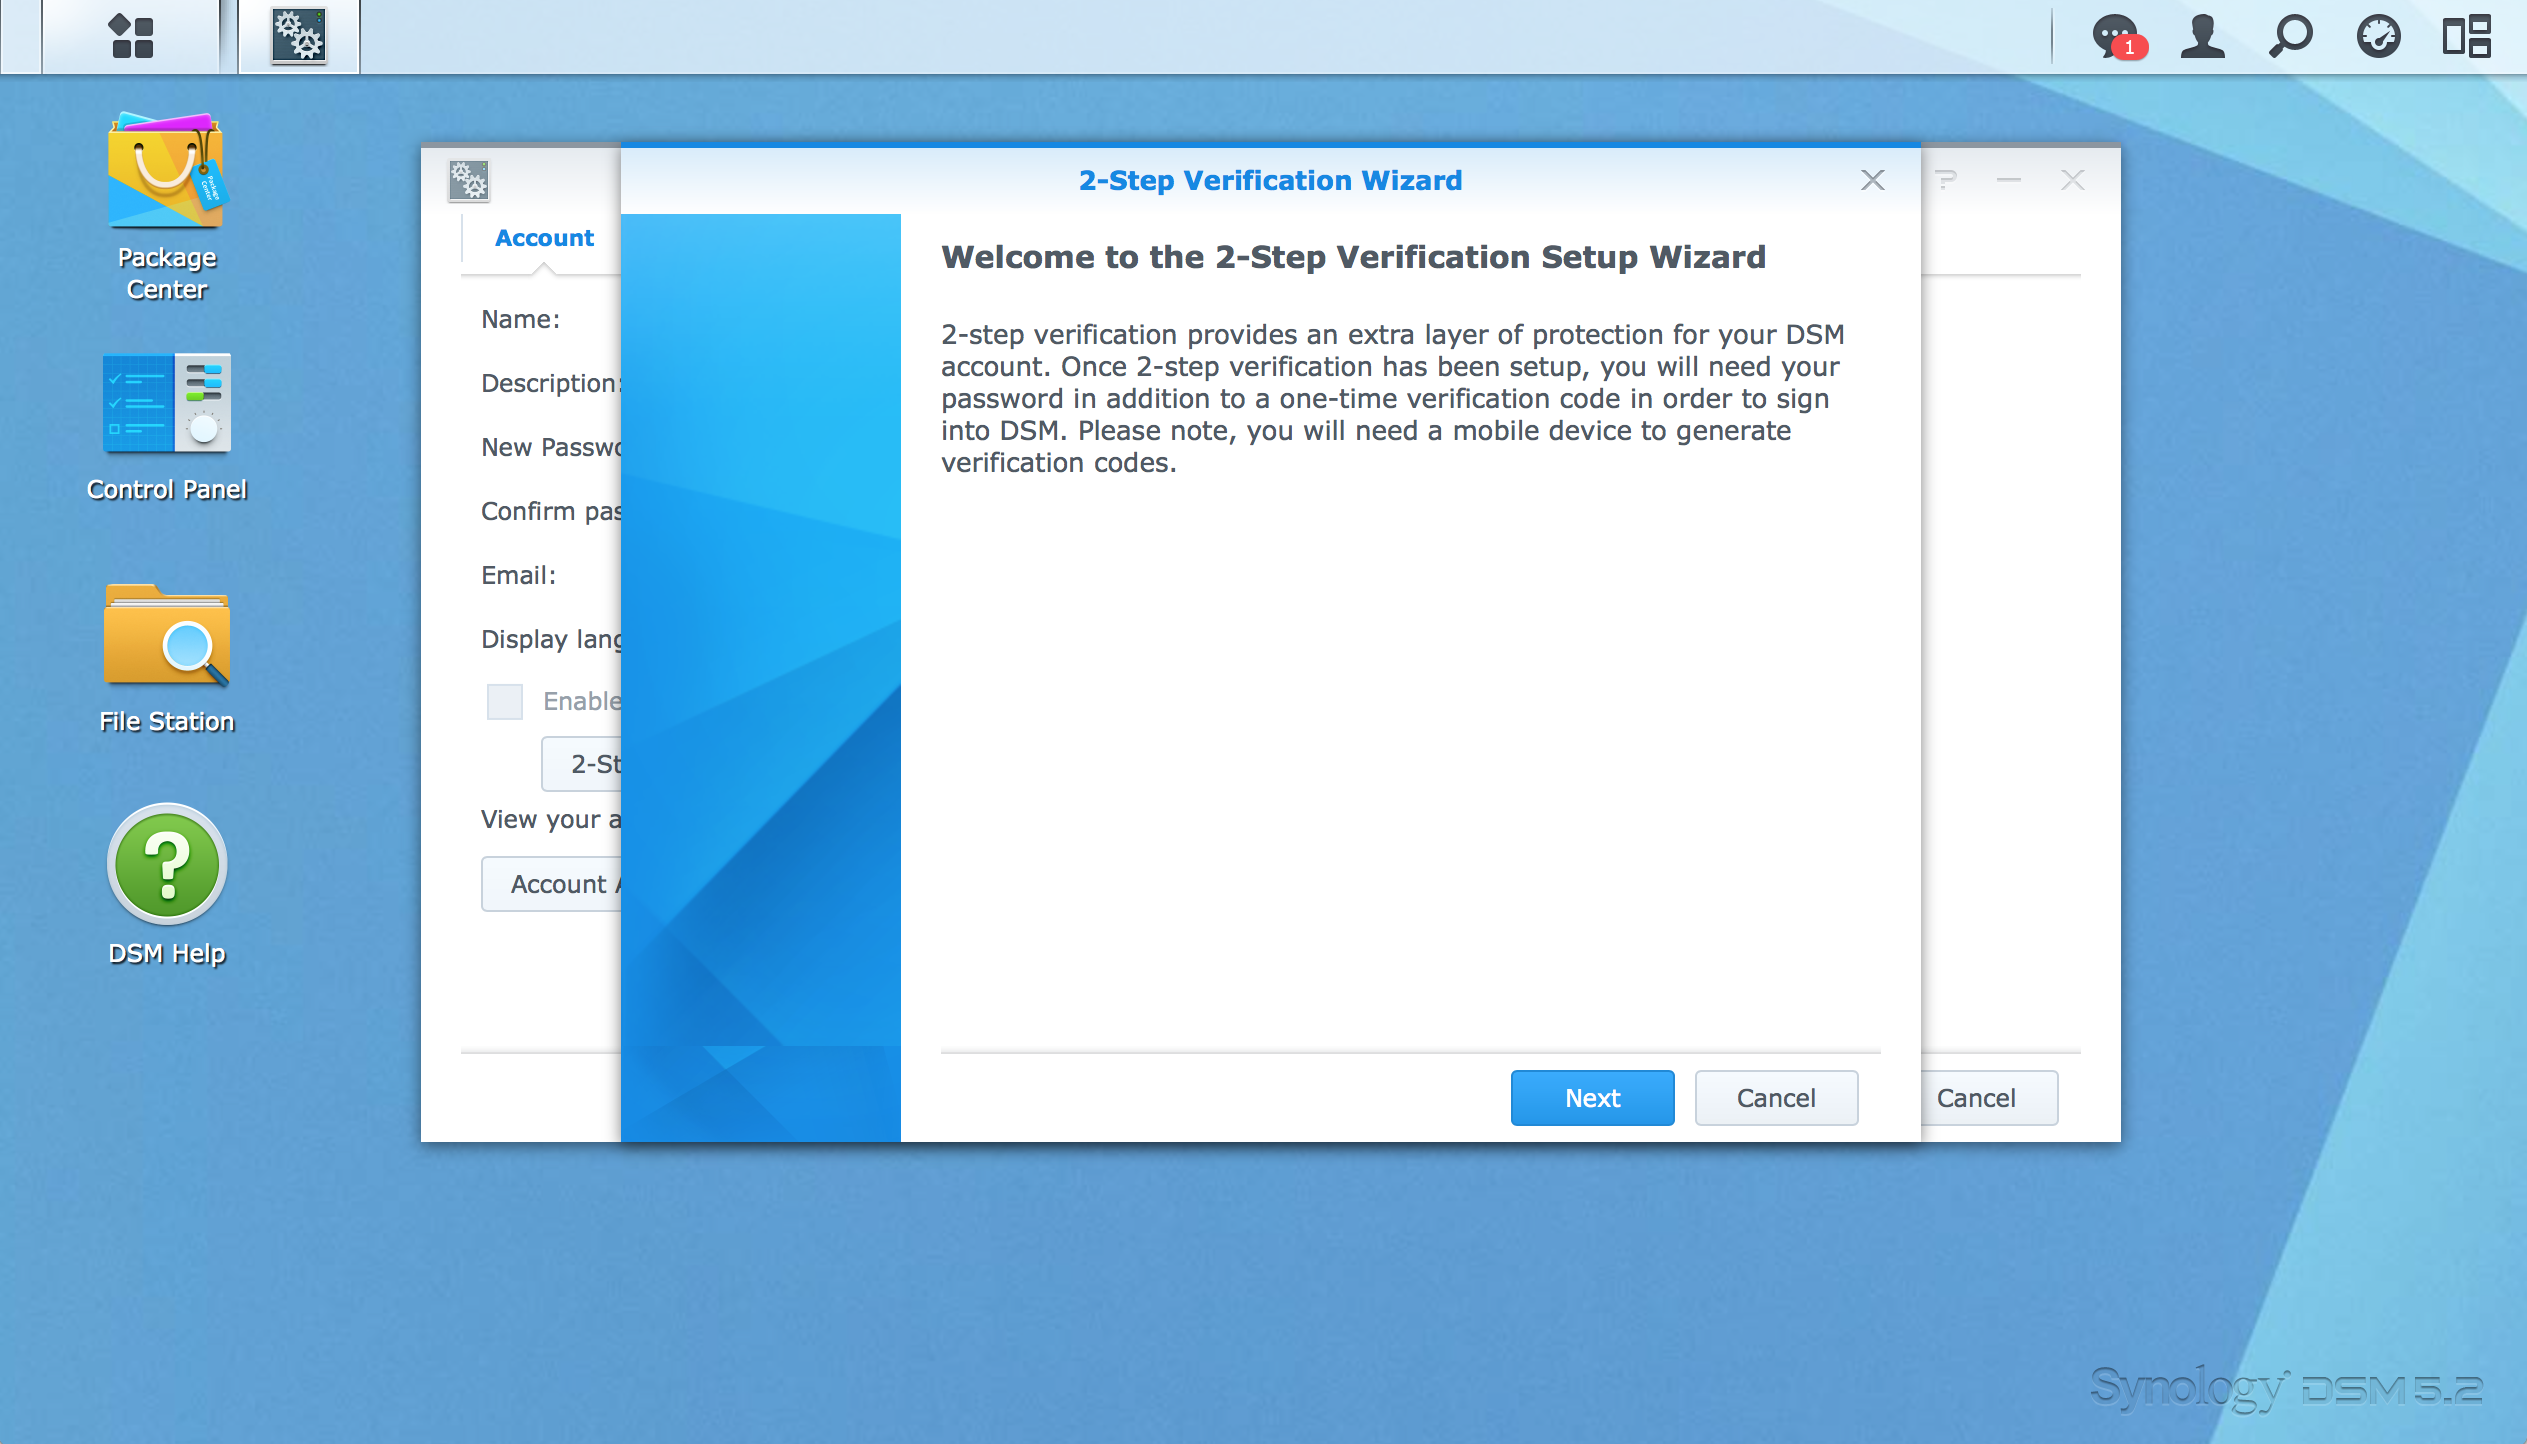
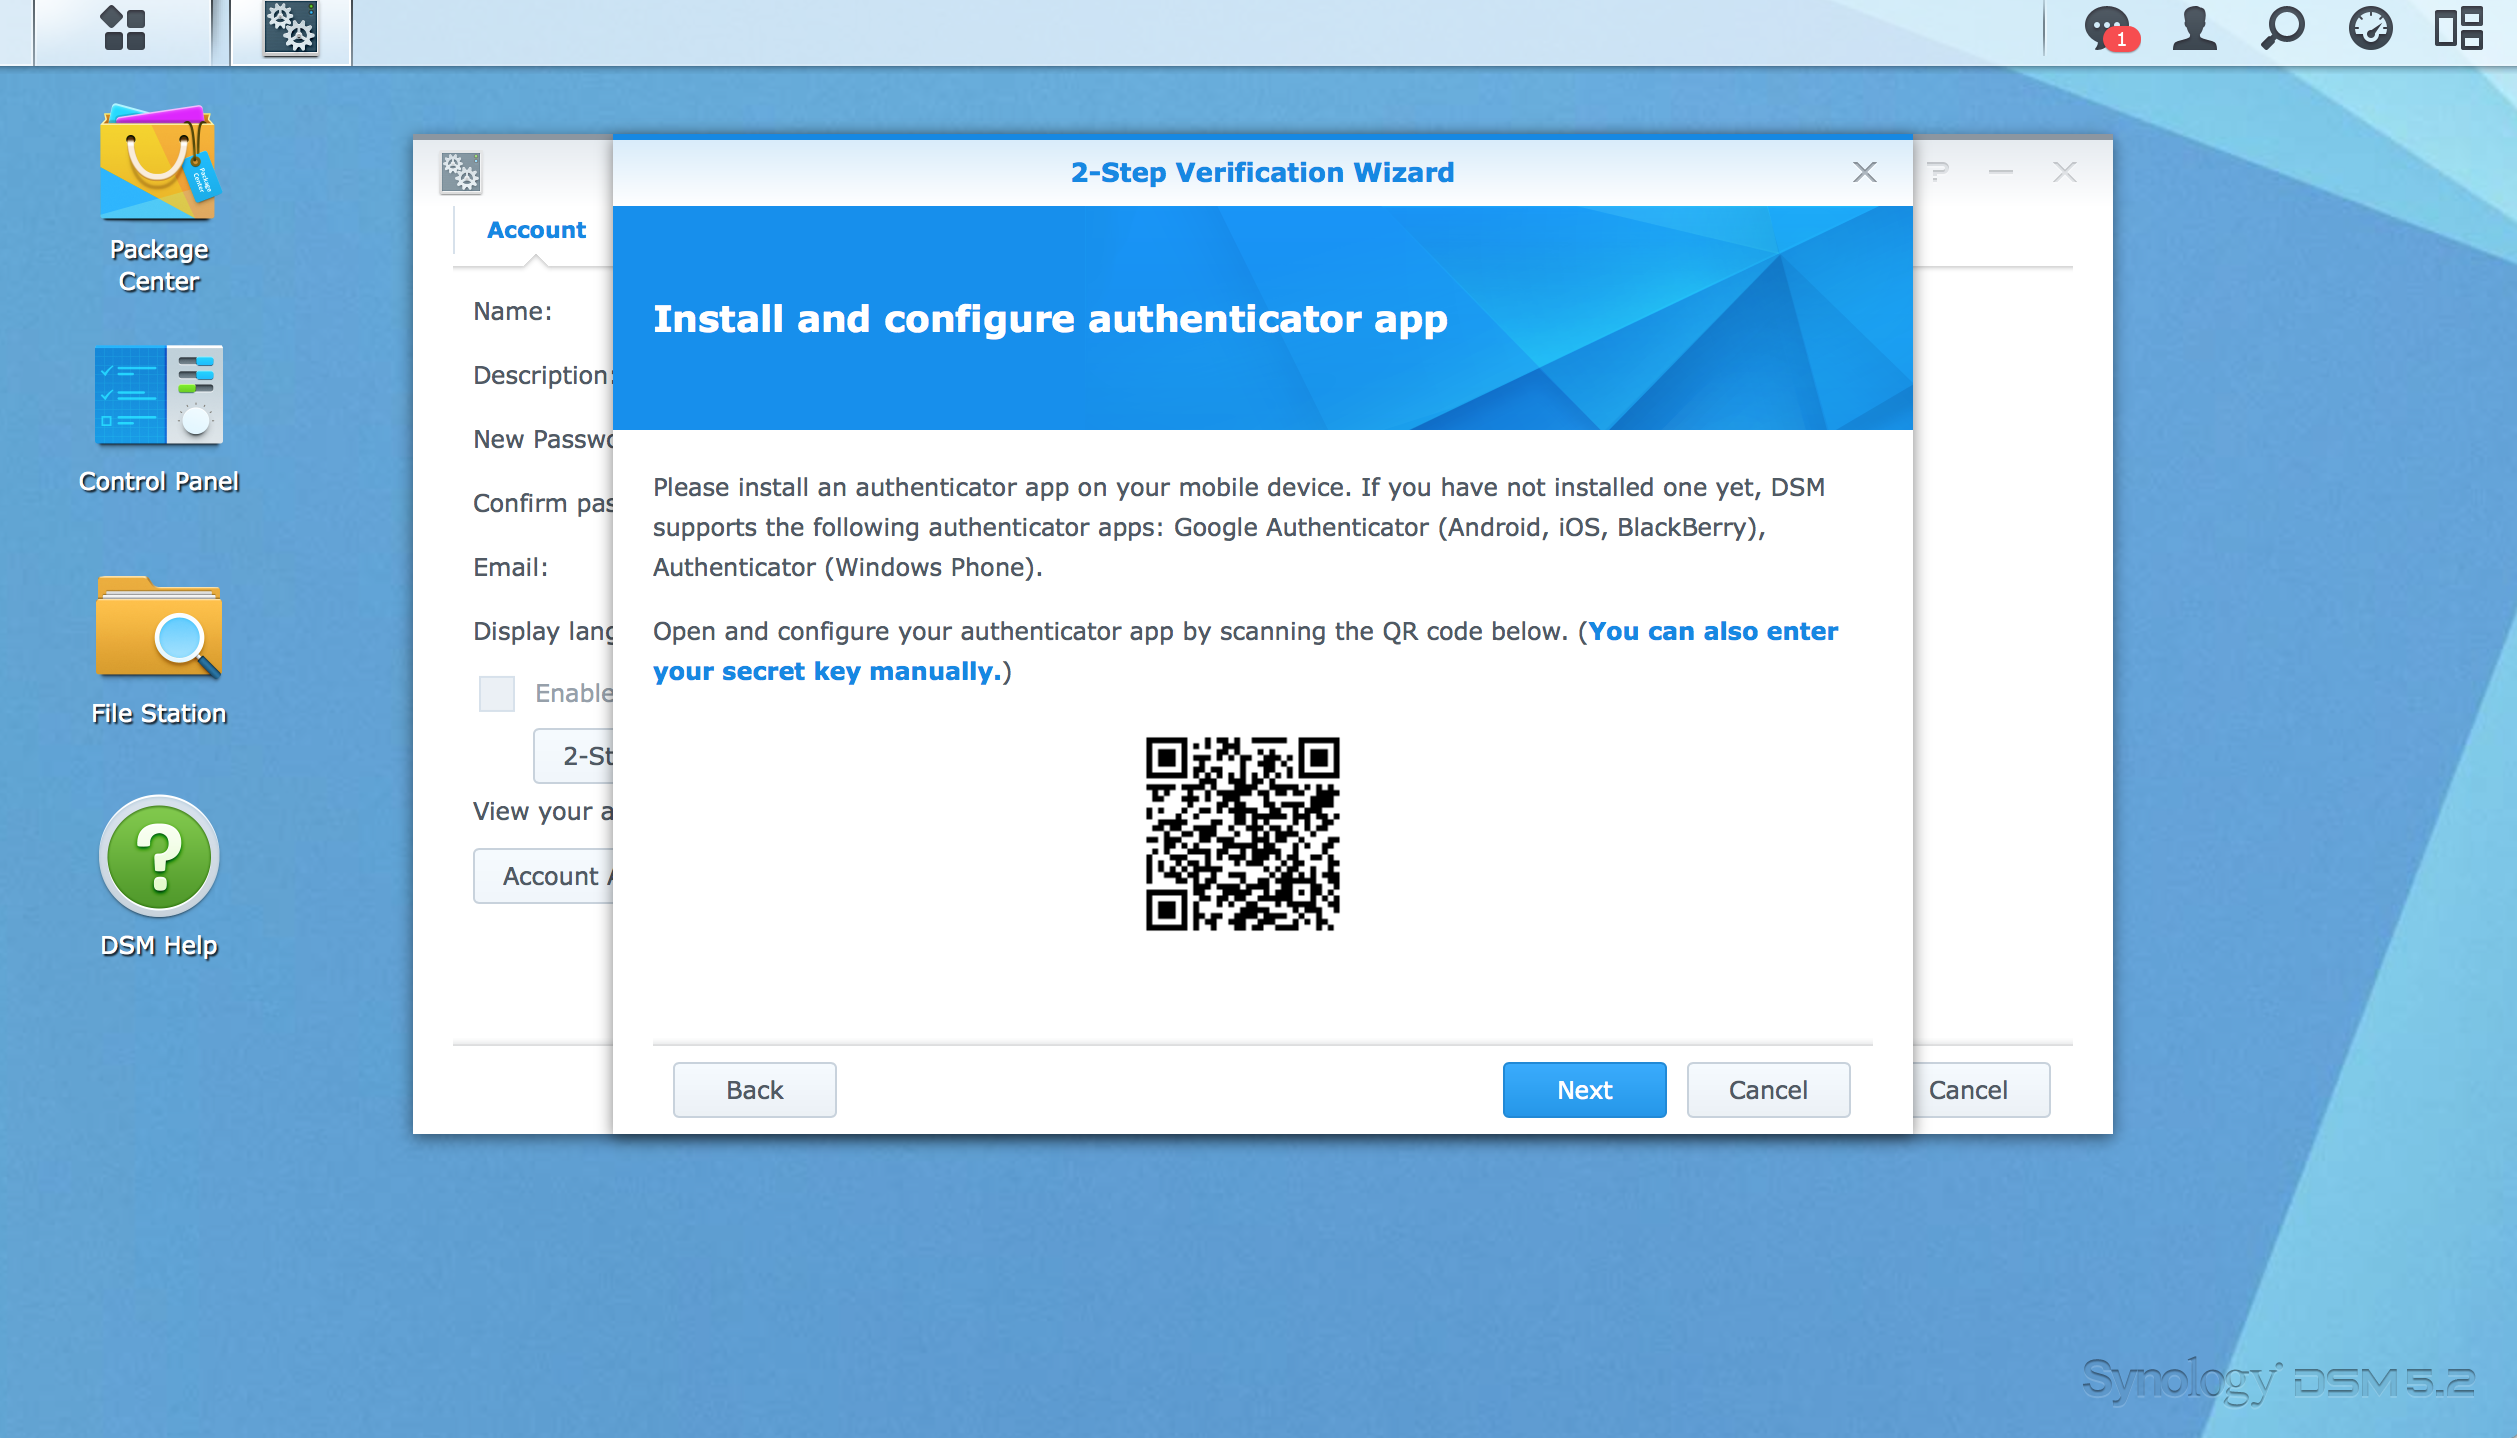
3. Initiate the 2-Step Verification Setup Wizard. It’s important to note that you must have a smart phone in order to take advantage of the two-step verification.
4. Install the proper authenticator application per your mobile device platform and respective app store. I use an iPhone and the Google Authenticator iOS app was a free download from the App Store. Ironically enough, the Synology OS only supports the Google Authenticator app (and to think I purchased the Synology to get one step further away from using Google!). However, this app only generates a random 6 digit pin every 30 seconds on your mobile device.
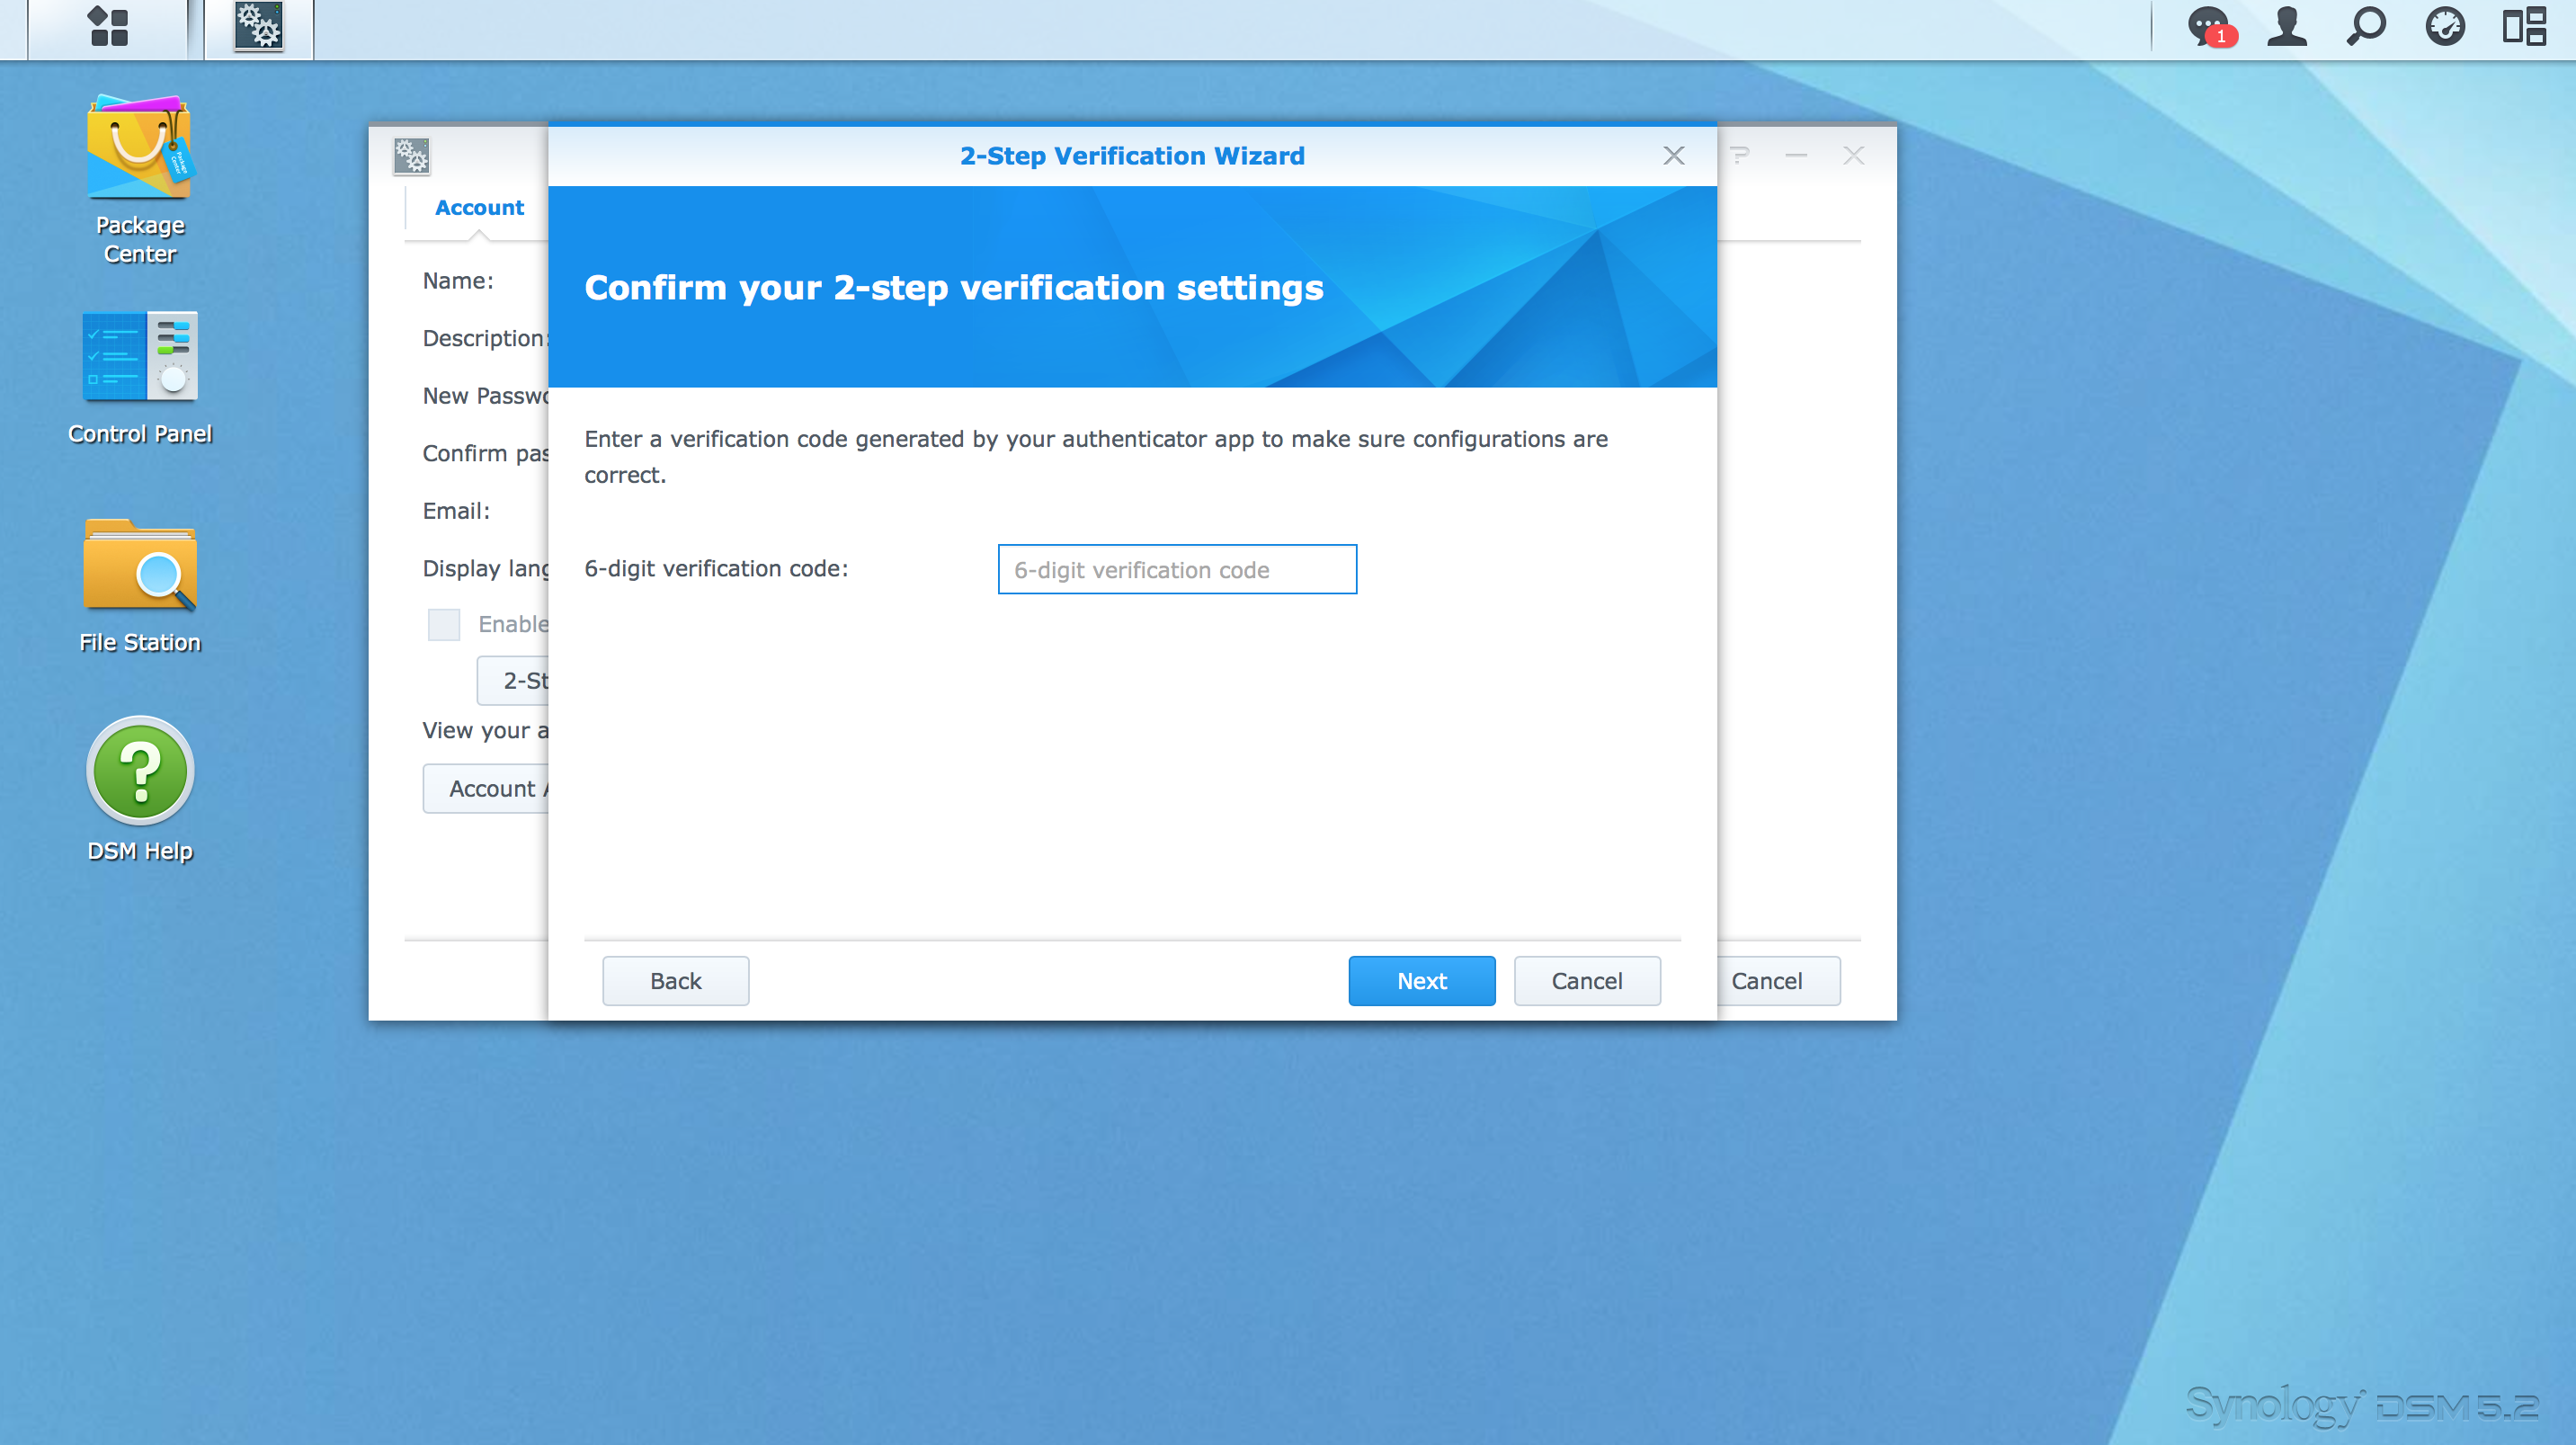
5. Scan the barcode with your smartphone and it will generate a random 6 digit pin.
6. Enter the verification code provided by the Google Authenticator app.
7. Enter your email address in case your mobile device is lost, you will still be able to gain access to your Synology.
8. Confirm your email address and that’s it! Now time to test out the two-step authentication.
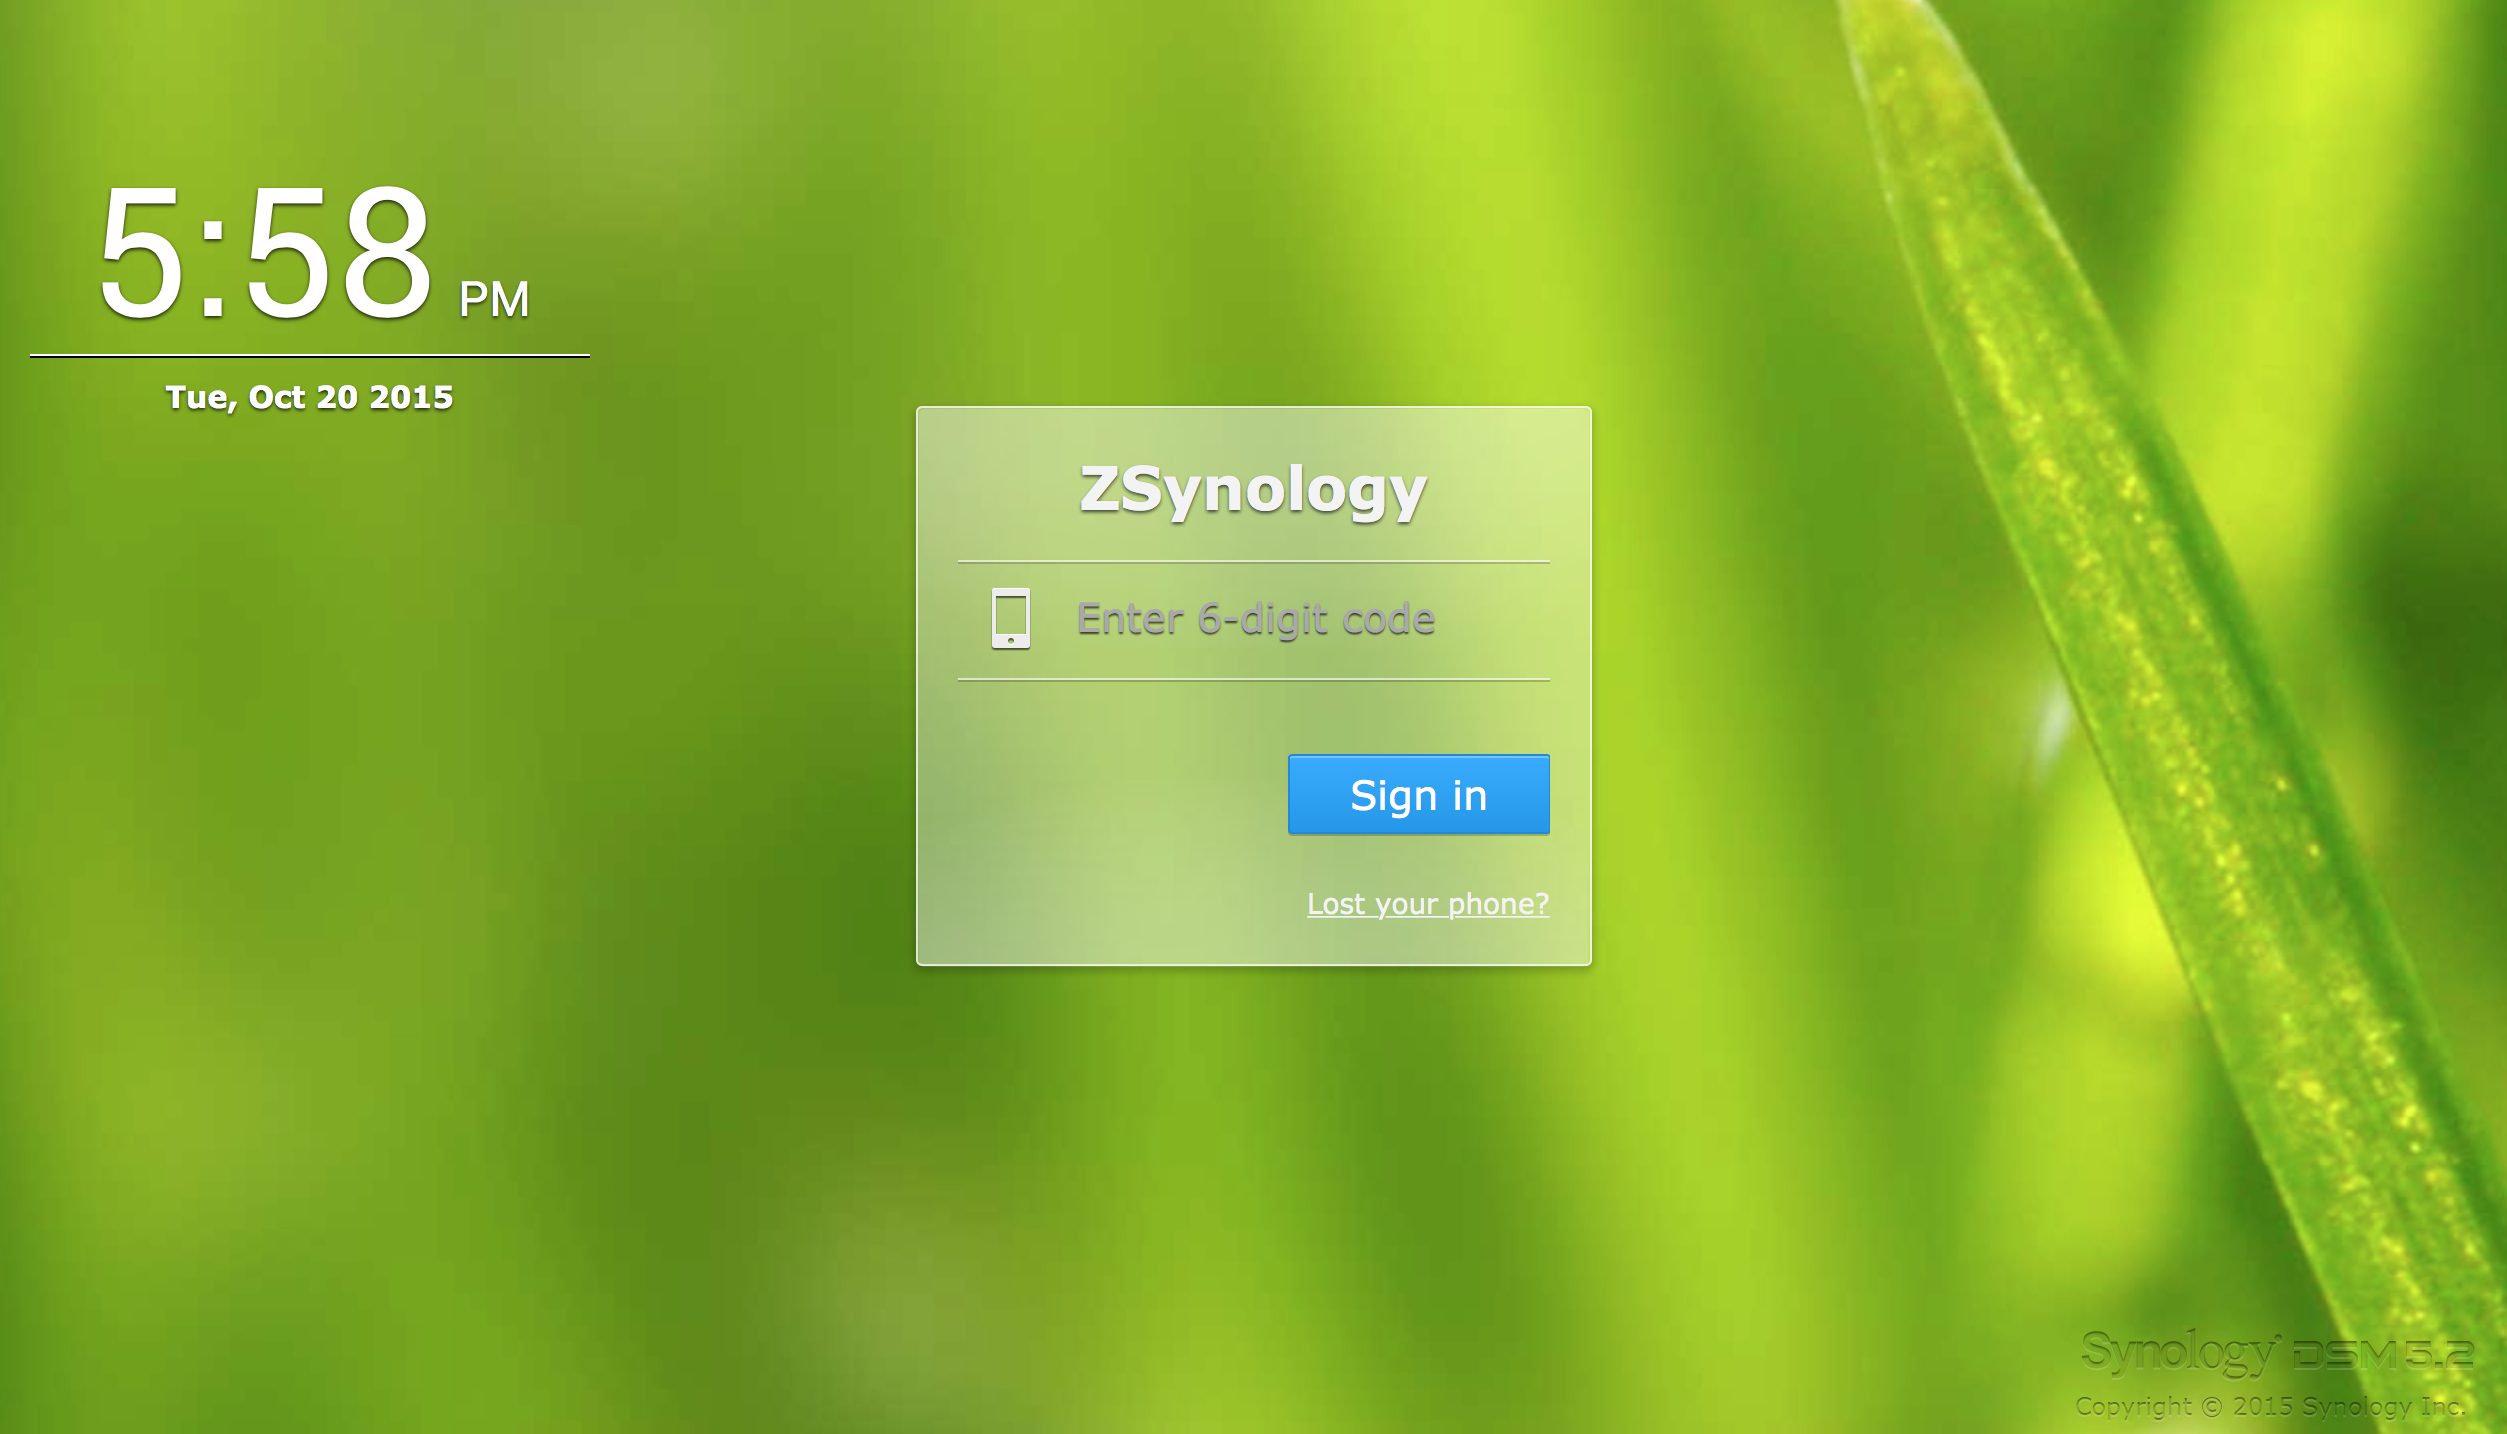
With your mobile device handy, the next time you sign in it will prompt you for the 6 digit pin. And with that, your personal data is much more secure!

Support Engineer, Kurt Griarte, explains, “Unfortunately in today’s technological era, we are constantly reading about people getting hacked. Two-step authentication makes it harder for someone to access your data because it’s based on the premise that ‘an authorized actor is unlikely to be able to supply both factors required for access.’”
Comments are closed.